Portland Guitar Co. | Portland Oregon | Contact Jay Dickinson-503.245.3276 | jay@portlandguitar.com
Portland Guitar Pretty Good Intonation (PGPG) System
In The Build Process
Atto Model
ATM 2.1.64
- Body: Padauk
- Top: Spanish Cedar
- Neck: Mahogany
- Binding: Cream PVC
- Fretboard, Headstock, Bridge: Indian Rosewood
Page 3
 I need to sand the top and bottom edges of the rim so they match the shape of the top and back. The top is flat, so that is easy. The bottom has the shape of a bowl with a 16 foot radius. Fortunately I have a sanding plate with just the right shape. Here I have marked the edge with a sharpy. When all of the marks are gone I know the shape is correct.
 ( 062 ) 16-Feb-2015
I place a sheet of sandpaper on the sanding plate and apply a little elbow grease.
 ( 063 ) 16-Feb-2015
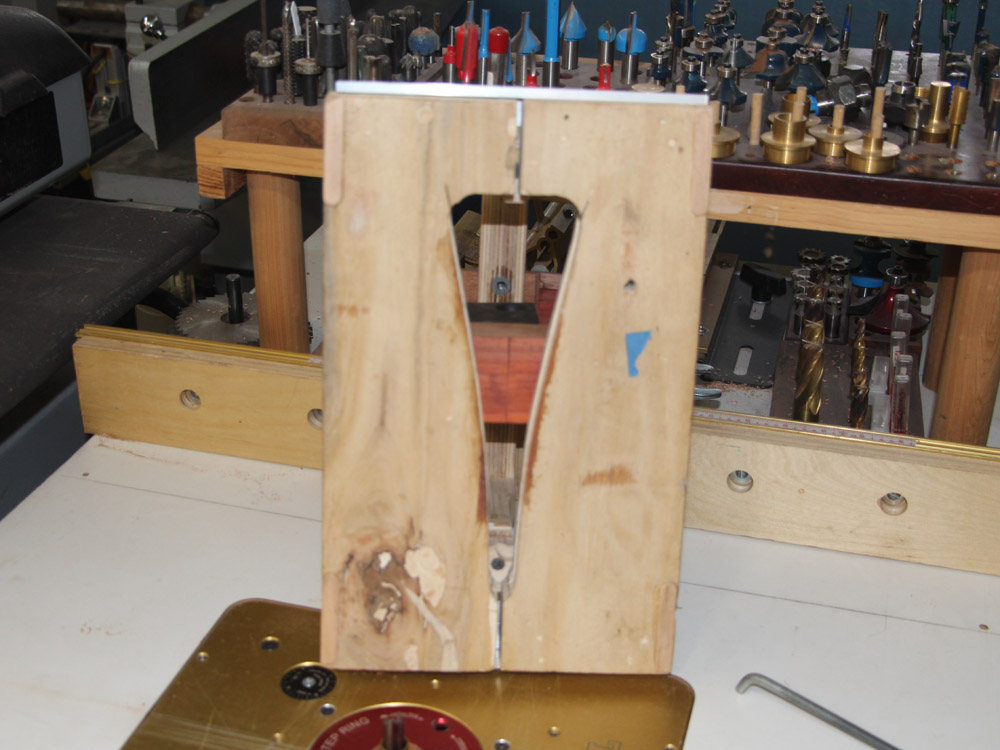
Now I have set up to route the heel channel in the heel block.
 ( 064 ) 16-Feb-2015
This channel will have the same shape as the heel of the neck. My routing fixture has a template in the base with the right shape.
 ( 065 ) 16-Feb-2015
I run the router around the template...
 ( 066 ) 16-Feb-2015
... until the channel is 1/2 inch deep in this case.
 ( 067 ) 16-Feb-2015
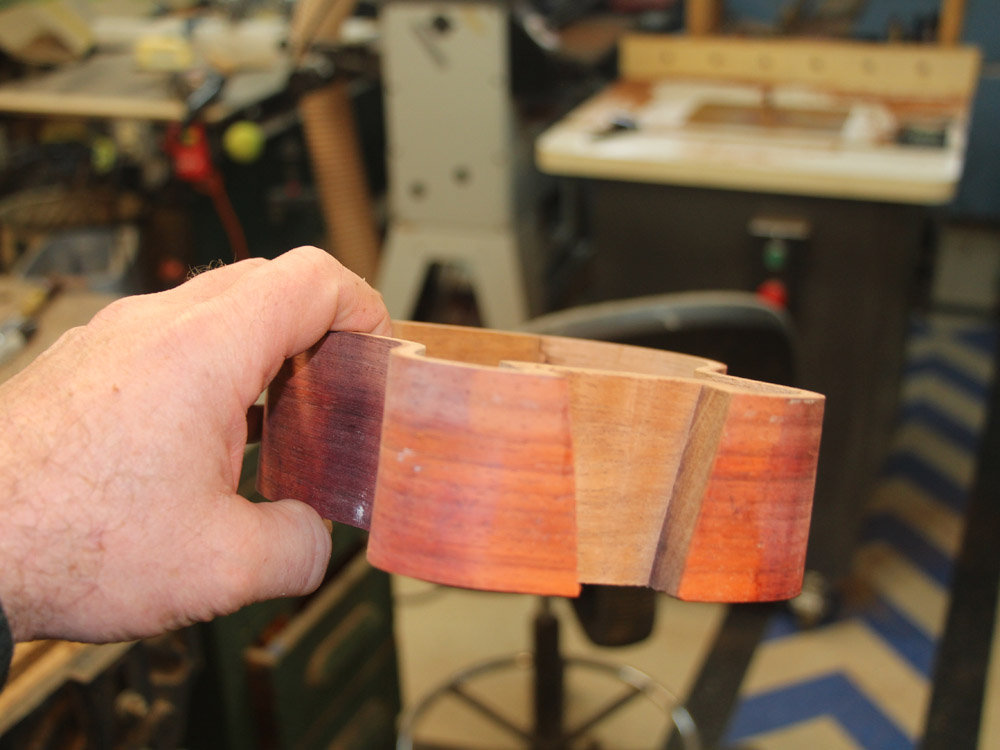
Before taking the rim off of the fixture I check to make sure everything looks OK.
 ( 068 ) 16-Feb-2015
The heel channel.
 ( 069 ) 16-Feb-2015
Here I have set up my CNC router to route the channels and pieces for the rosettes.
 ( 070 ) 16-Feb-2015
I am using a very small mill end tool to create the fine detail.
 ( 071 ) 16-Feb-2015
The channel for the rosette.
 ( 072 ) 16-Feb-2015
Here I am routing out the inlay for the rosette.
 ( 073 ) 16-Feb-2015
And it drops right into place.
 ( 074 ) 16-Feb-2015
A few of the pieces for the contra-rosette. The design for the rosettes was inspired by a pin Steven created.
 ( 075 ) 16-Feb-2015
Routing the inlay pockets in a piece of burled maple .
 ( 076 ) 16-Feb-2015
Little pieces...
 ( 077 ) 16-Feb-2015
... artfully arranged.
 ( 078 ) 16-Feb-2015
In this picture the contra-rosette is pressed up against the top for effect.
 ( 079 ) 16-Feb-2015
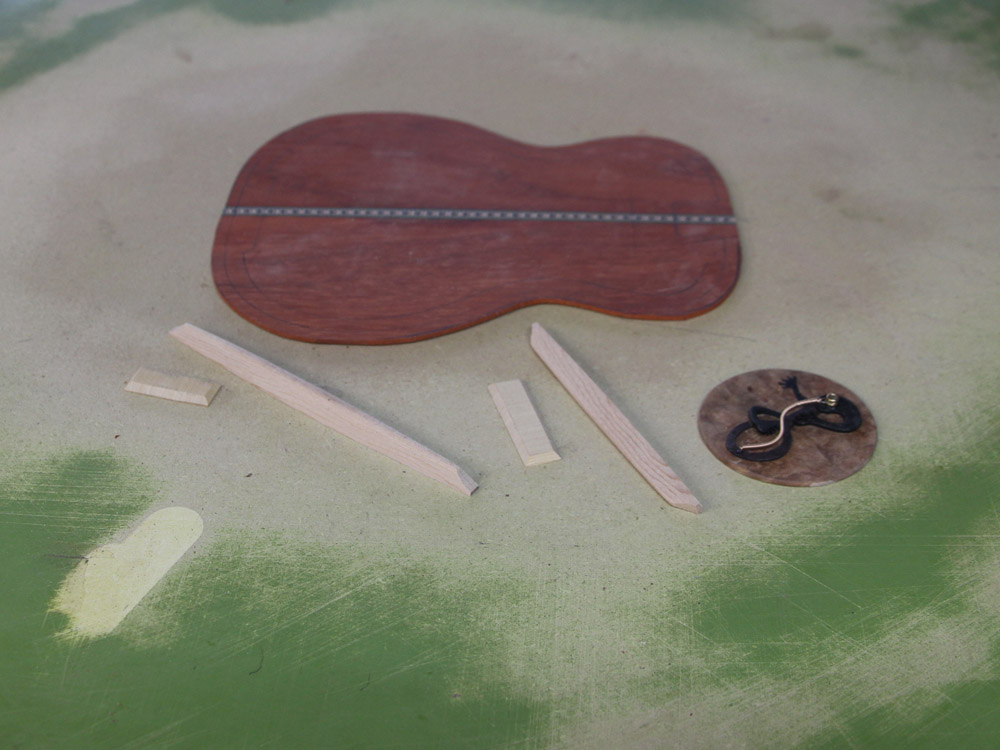
And here is how they will look in the finished guitar.
 ( 080 ) 16-Feb-2015
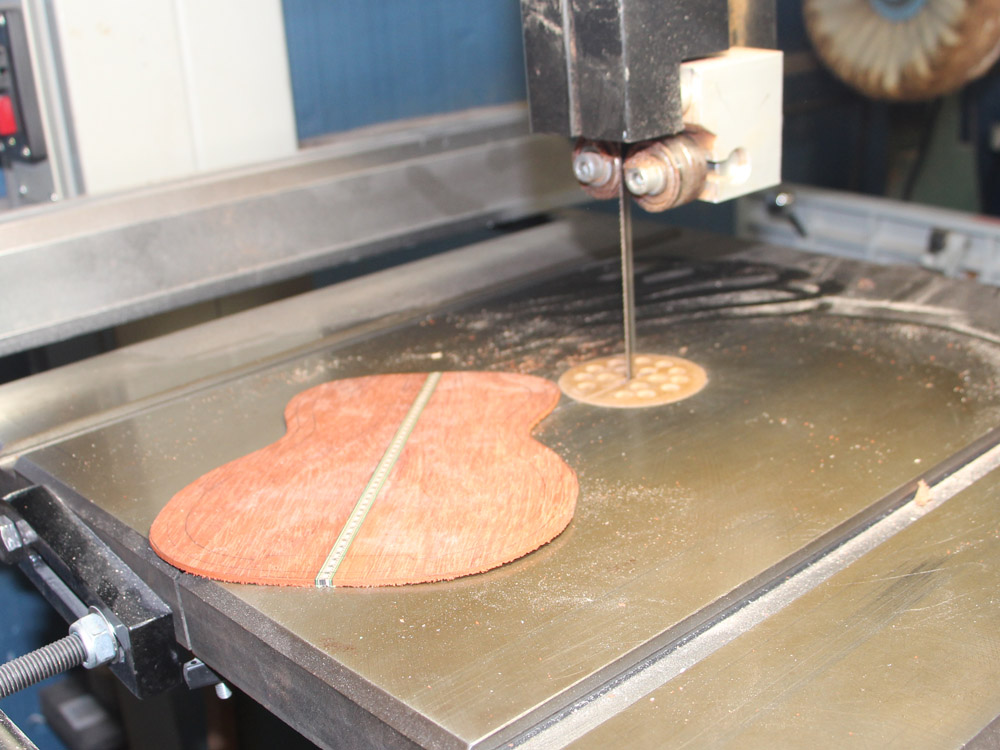
I outline the shape of the guitar on the back plate with a little bit of excess to give me a little space to move things around if I need to.
 ( 081 ) 16-Feb-2015
To make the braces I start with a piece of tight grained quarter sawn spruce.
 ( 082 ) 16-Feb-2015
I cut them to their approximate length.
 ( 083 ) 16-Feb-2015
Top and back.
 ( 084 ) 16-Feb-2015
The bottom of the braces must match the shape of the top and back. The top braces are flat, but the bottom braces get a 16 foot radius arc.
 ( 085 ) 16-Feb-2015
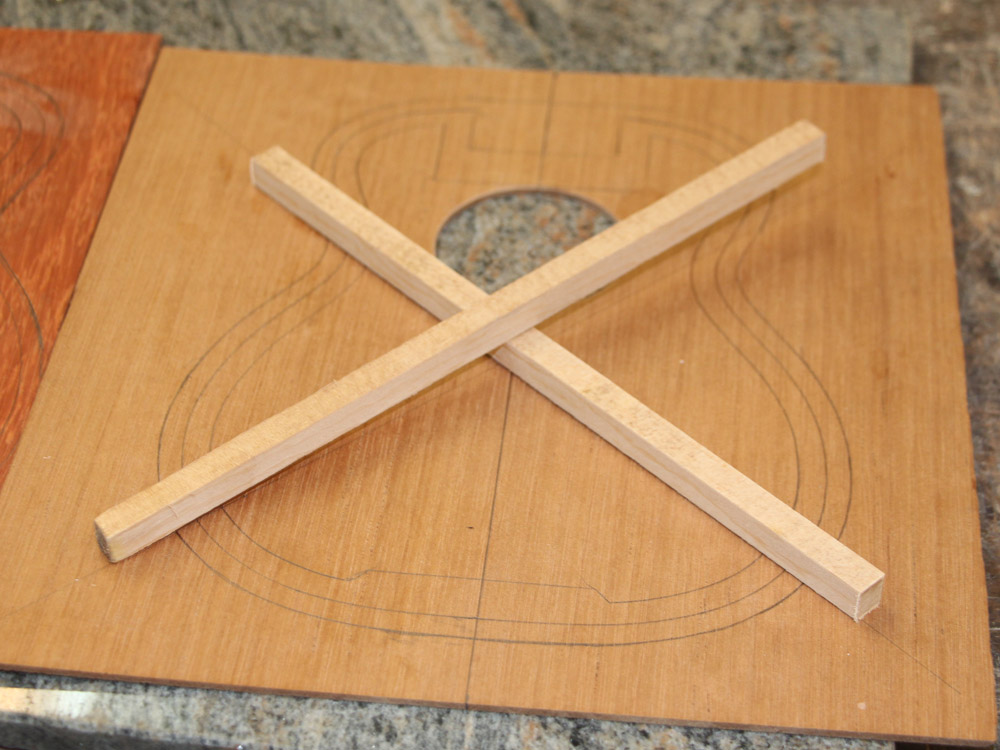
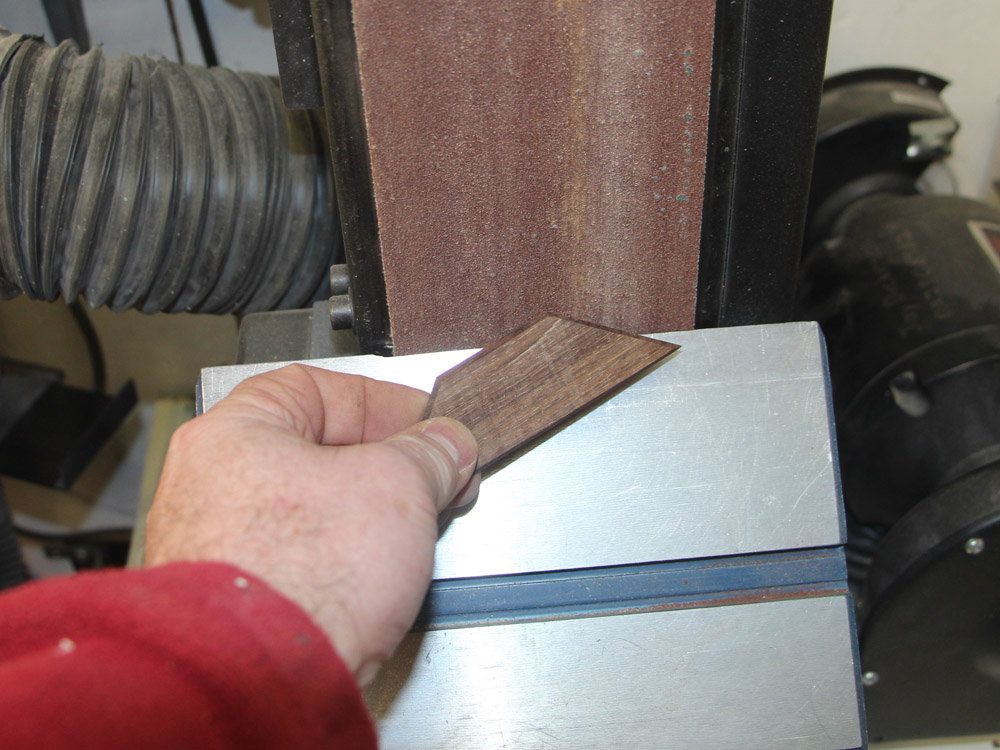
The X-brace on the top need a lap joint cut at the right angle, which is not a right angle. I use my band saw with a tilting fixture to nibble away the joint.
 ( 086 ) 16-Feb-2015
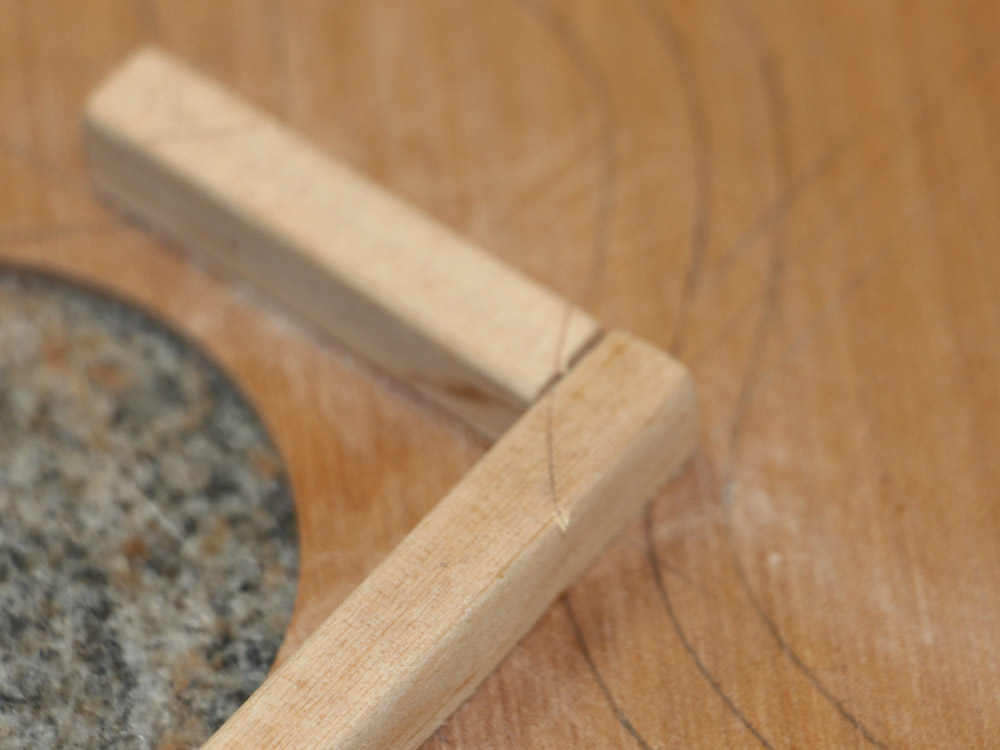
The two pieces fit neatly together.
 ( 087 ) 16-Feb-2015
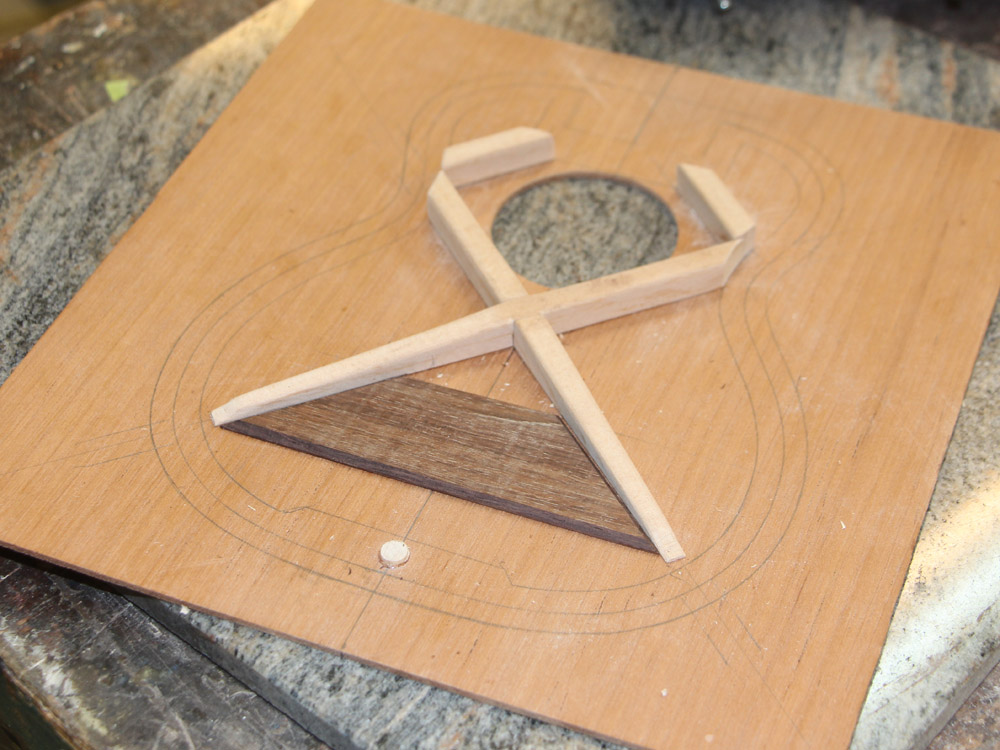
The A-frame braces get laid out.
 ( 088 ) 16-Feb-2015
 ( 089 ) 16-Feb-2015
I use my disk sander to shape the braces.
 ( 090 ) 16-Feb-2015
 ( 091 ) 16-Feb-2015
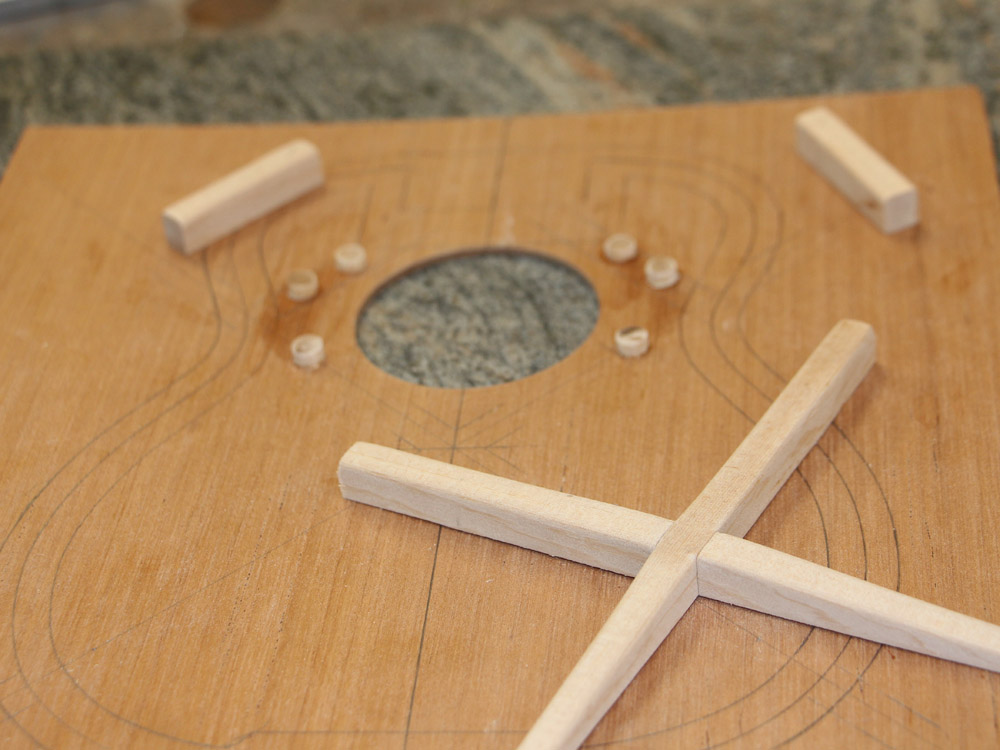
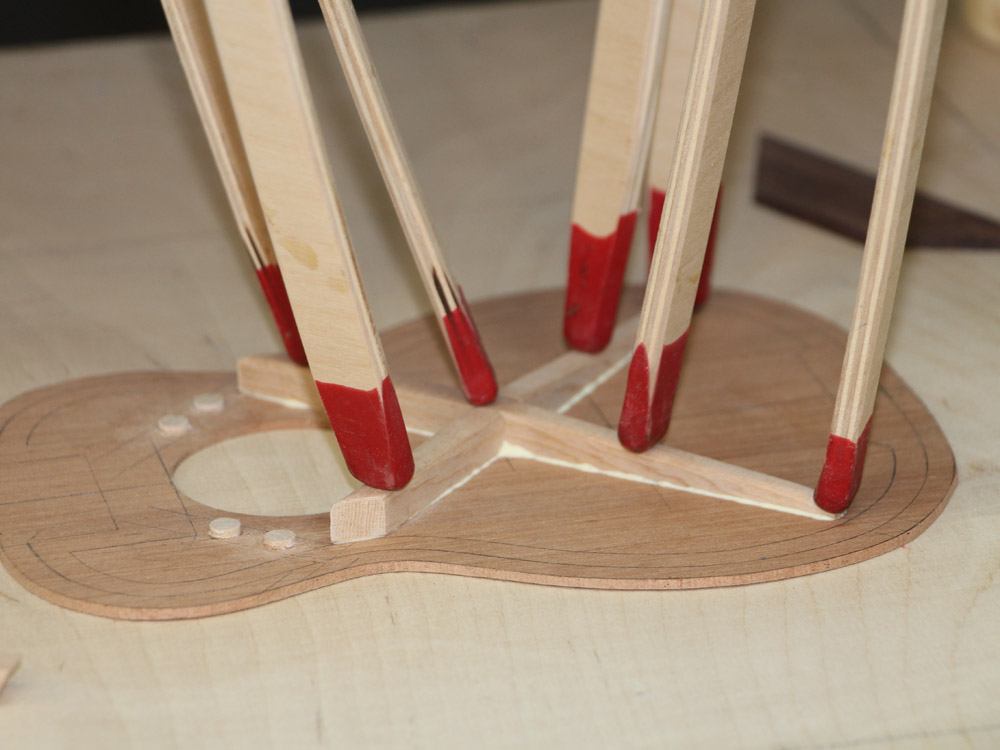
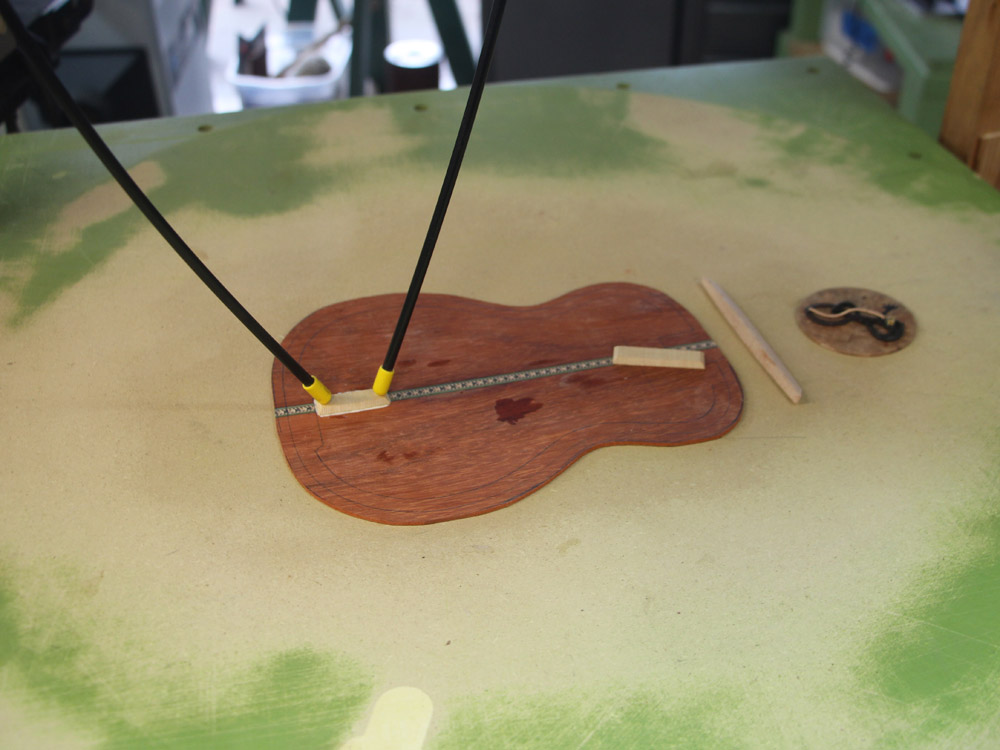
To trim the braces to there final length I need to make sure I can return them to their exact position. To do this I drill shallow holes in the bottom and insert a 1/4 inch piece of dowel.
 ( 092 ) 16-Feb-2015
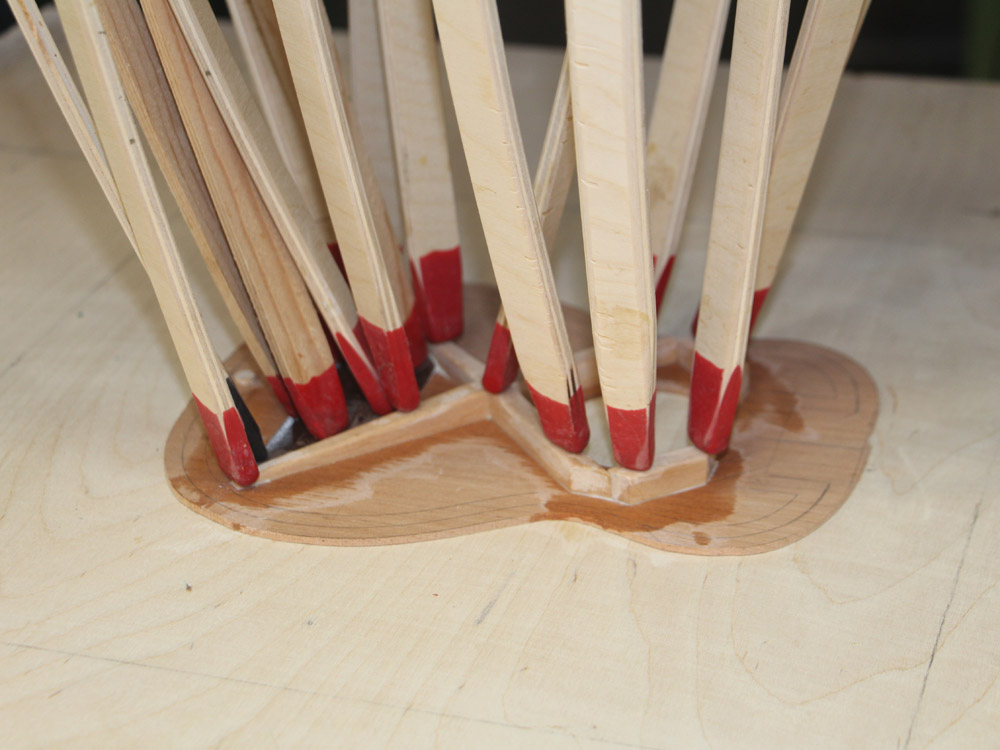
I place a small drop of glue on the end of the dowel and place the braces in there final position. When the glue is dry I can pull the braces away and the buttons remain glued to the top.
 ( 093 ) 16-Feb-2015
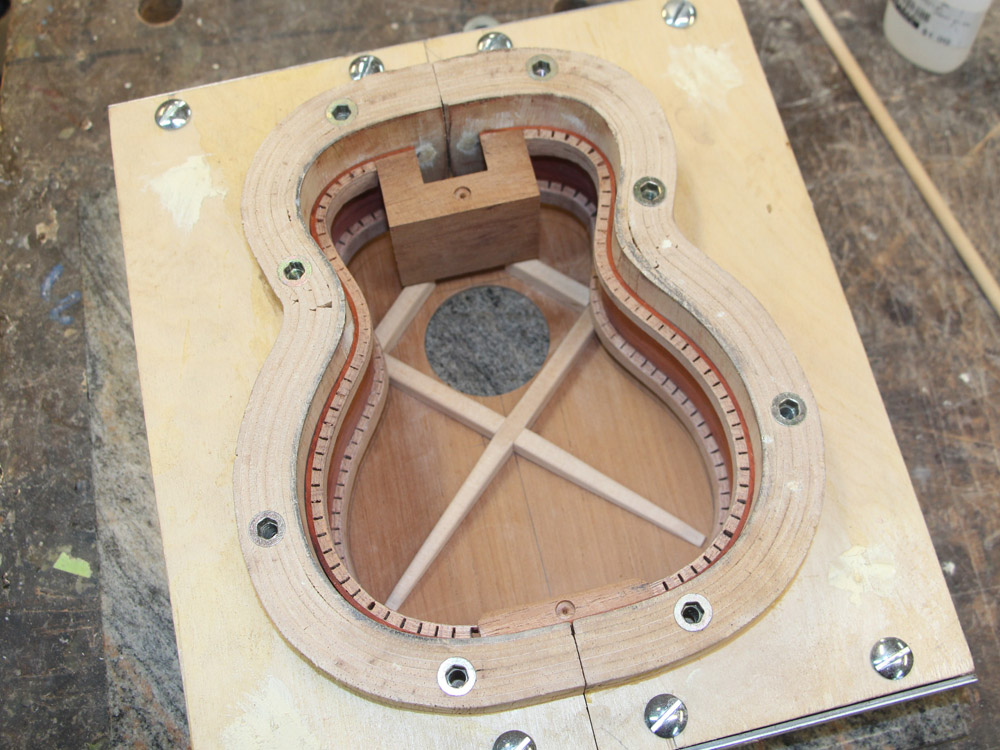
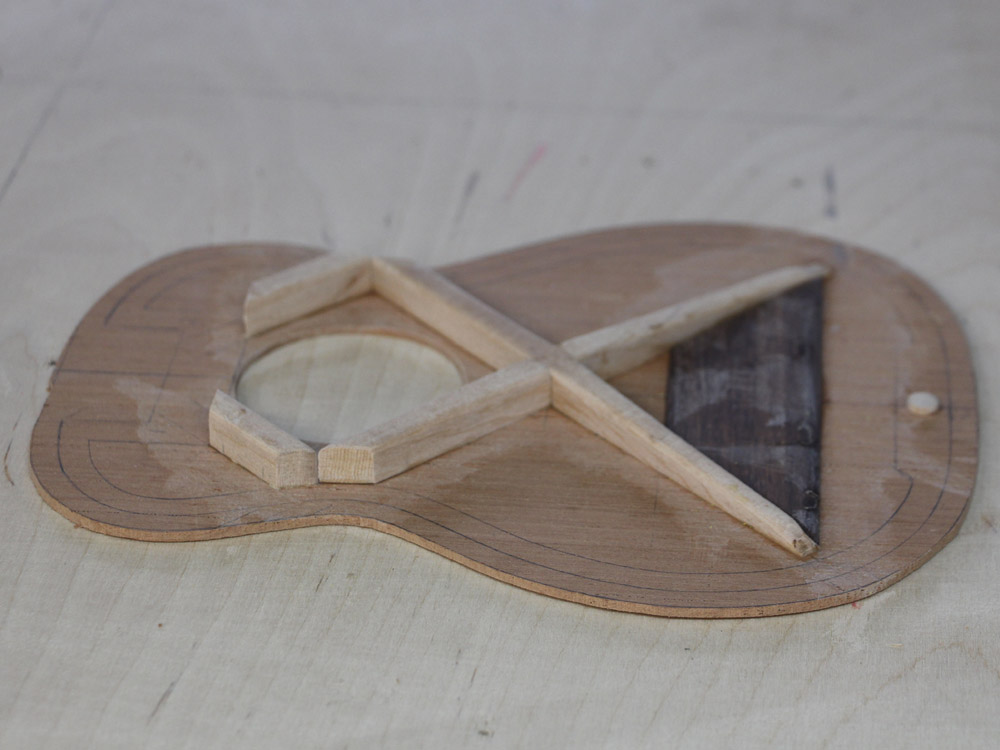
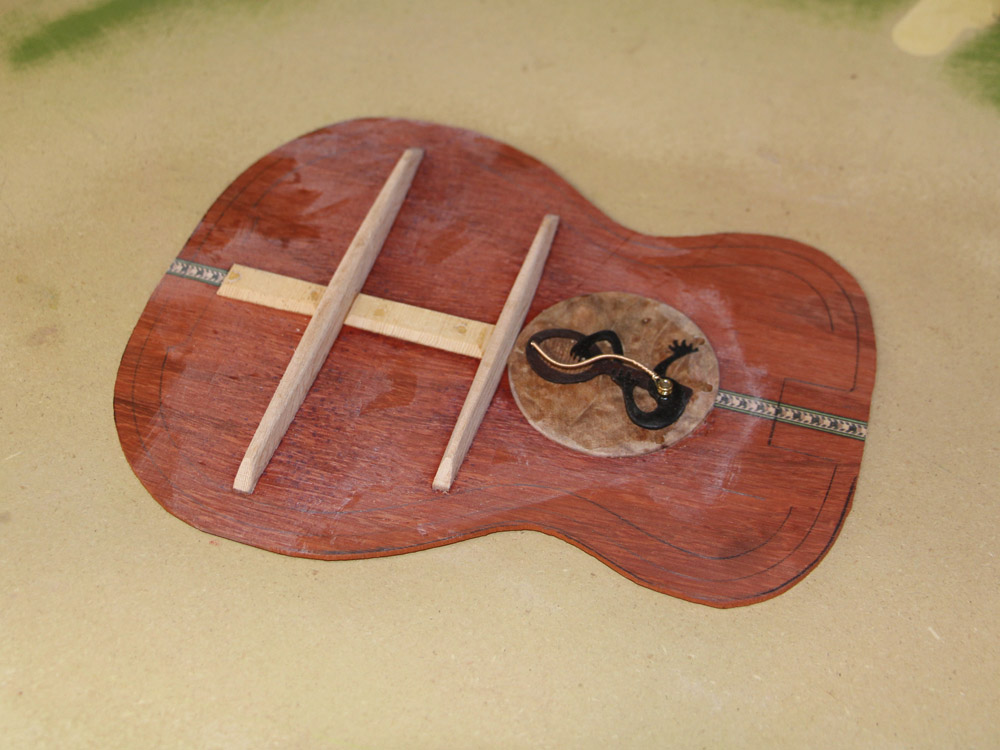
When I replace the braces now, they will fit onto the buttons and be in the right place. I need this feature because I will precisely mark the braces, and then remove them so I can trim them to the line. Then when I return the braces and glue them in place everything will line up perfectly.
 ( 094 ) 16-Feb-2015
Now I place the rim on top of the braces and mark the intersection with the rim.
 ( 095 ) 16-Feb-2015
I pull up the braces and trim them to the scribed lines.
 ( 096 ) 16-Feb-2015
And then, I can replace the braces on the top...
 ( 097 ) 16-Feb-2015
... and the rim fits down around the braces making a tight fit.
 ( 098 ) 16-Feb-2015
Here I am making the bridge plate out of Indian rosewood.
 ( 099 ) 16-Feb-2015
This plate protects the back of the top from damage caused by the ball ends of the strings, and helps tie the whole bridge system together.
 ( 100 ) 16-Feb-2015
Here I am using the bowl shaped sanding plate to shape the bottom of the braces for the back.
 ( 101 ) 16-Feb-2015
And a little work with the disk sander.
 ( 102 ) 16-Feb-2015
After a bit of hand sanding.
 ( 103 ) 16-Feb-2015
Here I have laid out the back pieces to make sure everything fits.
 ( 104 ) 16-Feb-2015
Now, after I have convinced myself that everything fits properly I cut out the top plate.
 ( 105 ) 16-Feb-2015
 ( 106 ) 16-Feb-2015
And then I cut out the back plate.
 ( 107 ) 16-Feb-2015
 ( 108 ) 16-Feb-2015
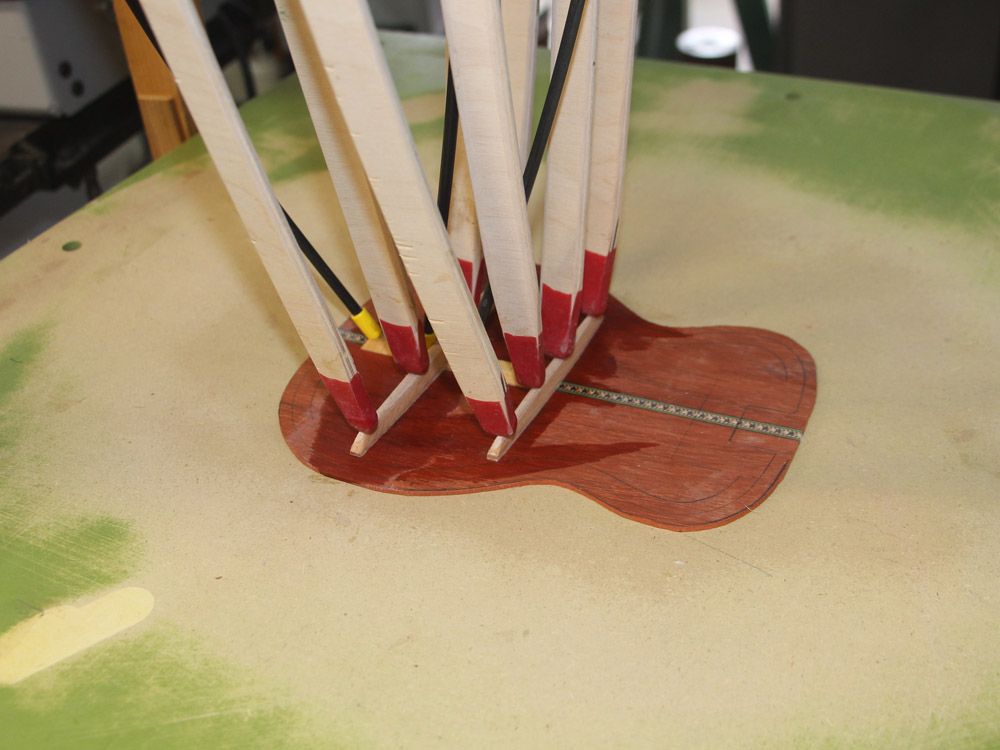
I start to assemble the top using my go-box. This tool lets my place bent sticks in just the right place to hold the braces in place as the glue dries.
 ( 109 ) 16-Feb-2015
 ( 110 ) 16-Feb-2015
 ( 111 ) 16-Feb-2015
 ( 112 ) 16-Feb-2015
The matrix of tall, medium, short, and no blocks on the underside of the top of the go-box lets me vary the force of the sticks to match the situation.
 ( 113 ) 16-Feb-2015
After the glue has set up I remove the sticks. A little hand sanding will clean up the excess glue.
 ( 114 ) 16-Feb-2015
Here are the parts for the back.
 ( 115 ) 16-Feb-2015
I place the sanding plate with the 16 foot radius in the go-box.
 ( 116 ) 16-Feb-2015
Now with the braces that were previously shape to match the bowl, the back takes on the shape of the bowl as the braces are pressed into place.
 ( 117 ) 16-Feb-2015
 ( 118 ) 16-Feb-2015
 ( 119 ) 16-Feb-2015
 ( 120 ) 16-Feb-2015
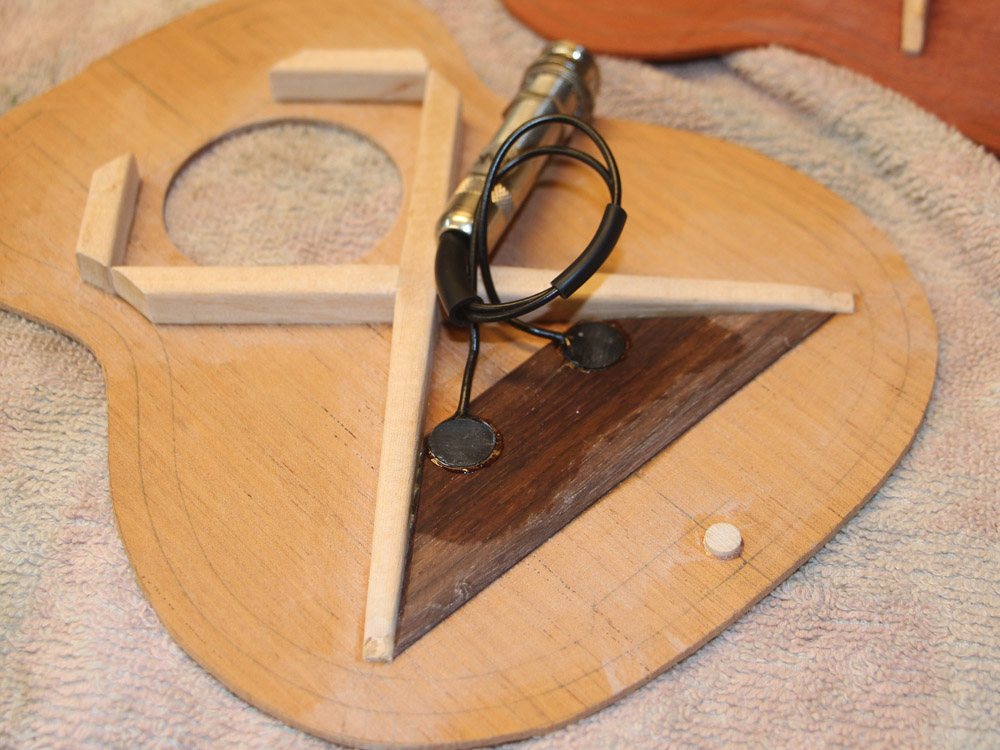
Next, I install the pickups onto the back of bridge plate.
 ( 121 ) 16-Feb-2015
It is much easier to install these pickups now before the body is glued together.
 ( 122 ) 16-Feb-2015
But first, I route a channel for the tail graft.
 ( 123 ) 16-Feb-2015
I am using the same strip as I used for the back strip.
 ( 124 ) 16-Feb-2015
A few clamps hold it in place.
 ( 125 ) 16-Feb-2015
After the glue has dried I sand the tail graft flush.
 ( 126 ) 16-Feb-2015
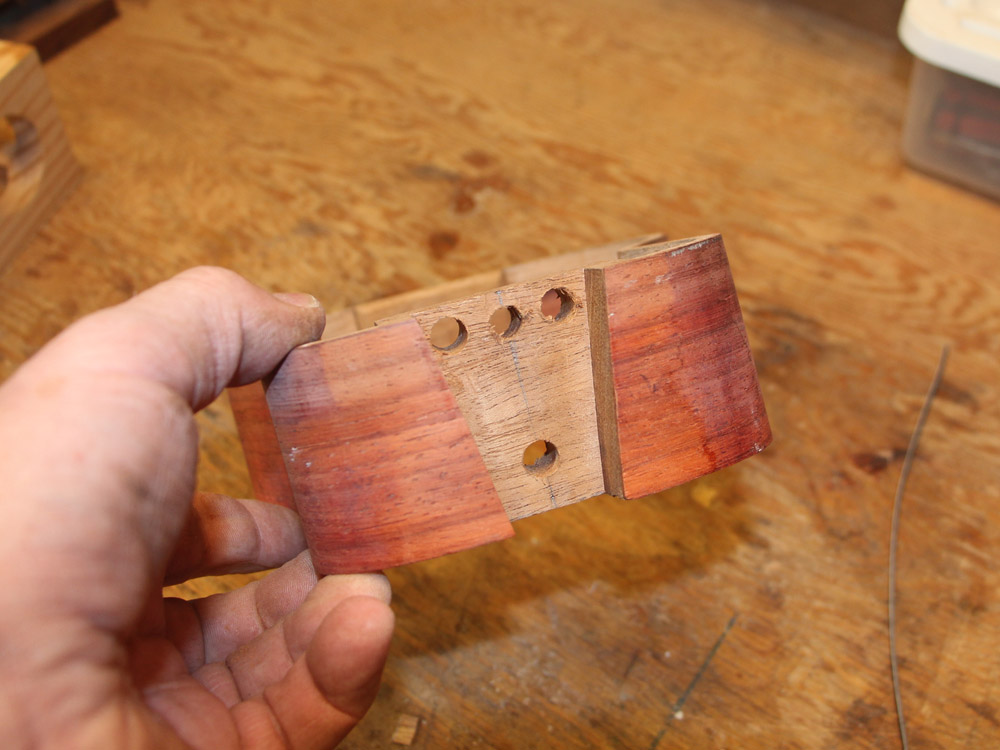
Next I drill the holes in the heel channel for the attachment hardware.
 ( 127 ) 16-Feb-2015
 ( 128 ) 16-Feb-2015
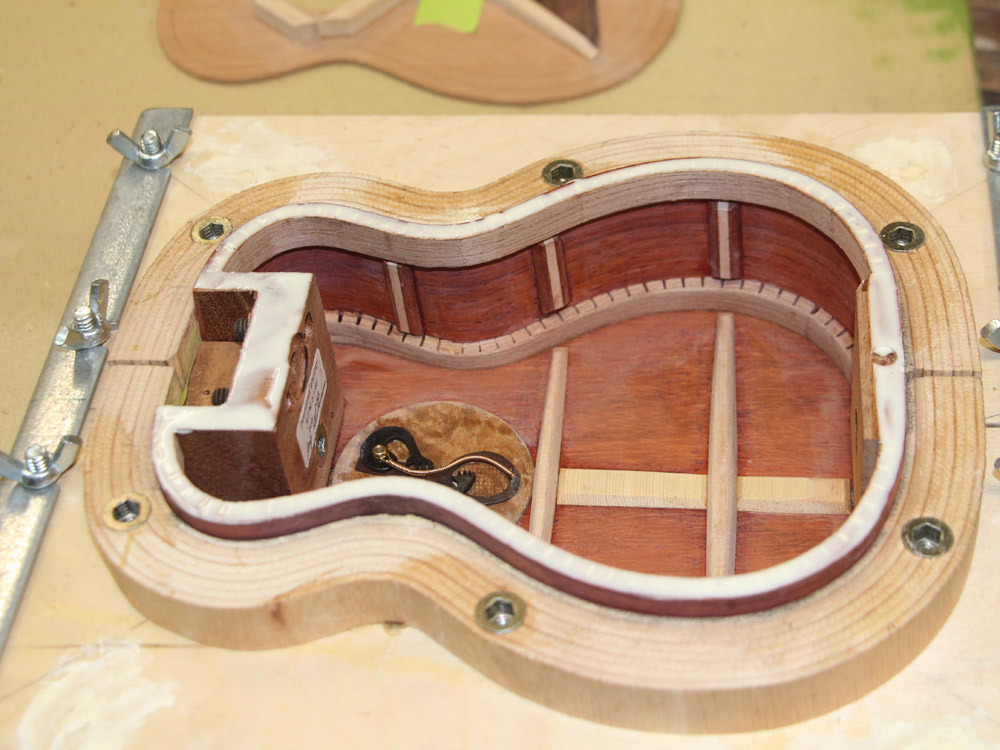
The top two set screws act as the fulcrum for the neck. The top center bolt in line with the set screws holds the neck in place, and the bottom bolt, which will be embedded in the heel of the neck, is used to change the angle of the neck relative to the body. With this setup the string action of the guitar can be easily adjusted.
 ( 129 ) 16-Feb-2015
I install braces to help prevent the sides from cracking.
 ( 130 ) 16-Feb-2015
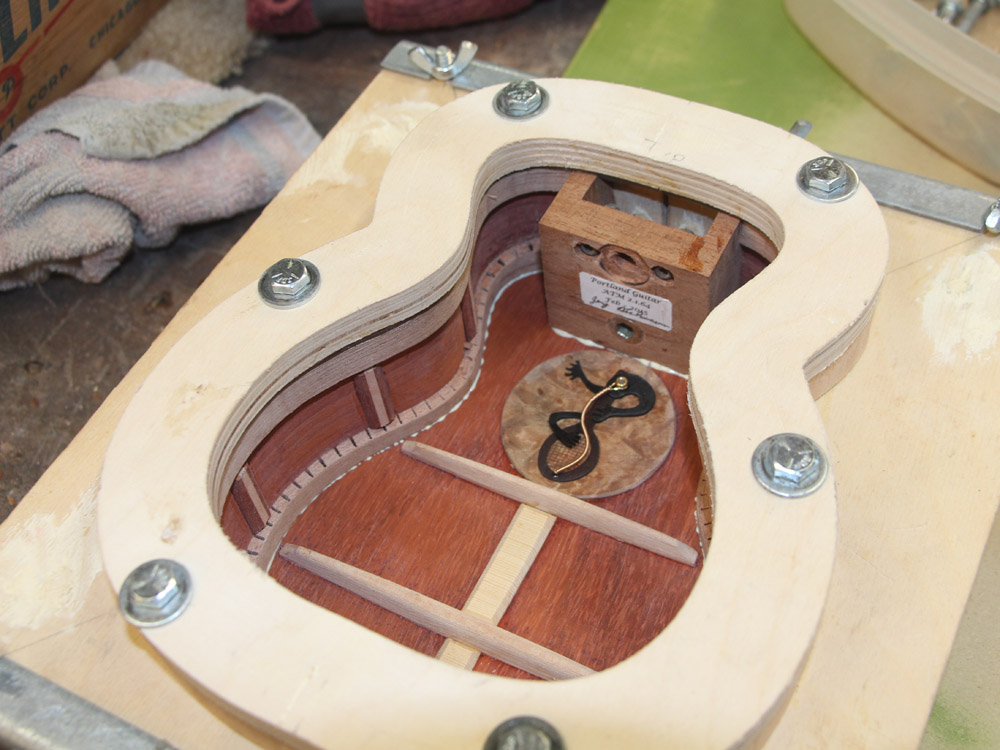
And the heel block gets a label.
 ( 131 ) 16-Feb-2015
Here I am drilling a hole for the output jack.
 ( 132 ) 16-Feb-2015
And here is how it will look when the jack is installed. However, this won't happen until after the finish is applied, so I have to make sure everything fits properly.
 ( 133 ) 16-Feb-2015
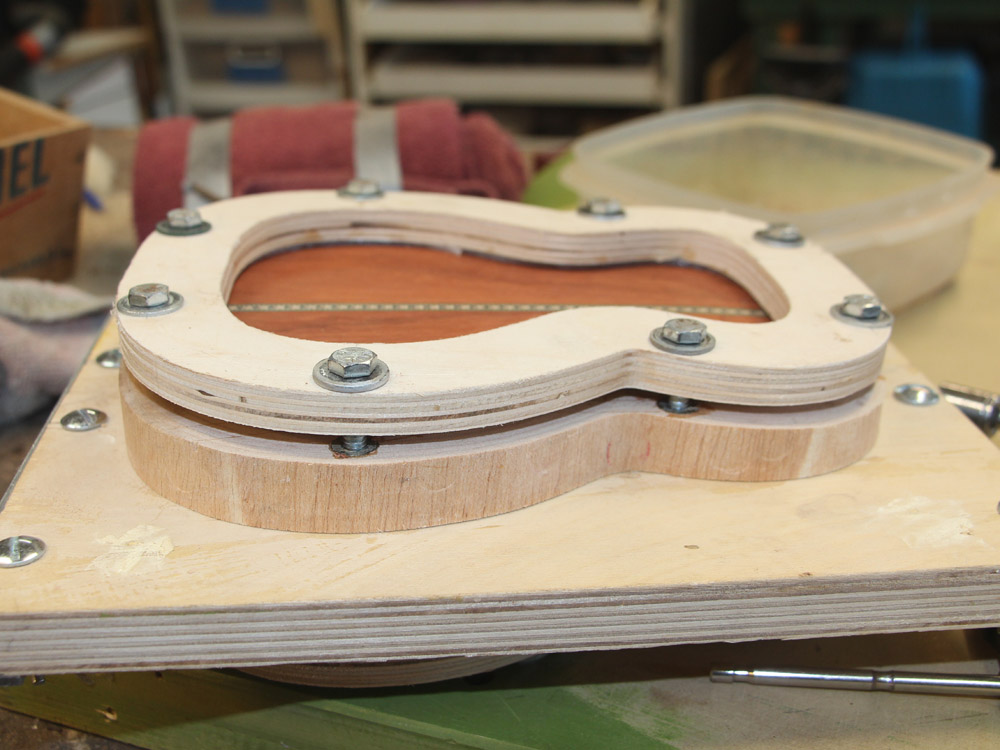
Now I am going to glue the top and back into place. After putting the rim into the sides form I have applied a thin layer of glue to the bottom edge of the rim.
 ( 134 ) 16-Feb-2015
And then I use to bottom flange to press the back into place. Here is where the alignment buttons come into play. The buttons make sure the back is positioned properly and I don't have to fuss with its placement as the glue starts to set up.
 ( 135 ) 16-Feb-2015
There is a little bit of glue squeeze out...
 ( 136 ) 16-Feb-2015
... that I clean up before it sets.
 ( 137 ) 16-Feb-2015
The back was roughed out so it was a bit over sized.
 ( 138 ) 16-Feb-2015
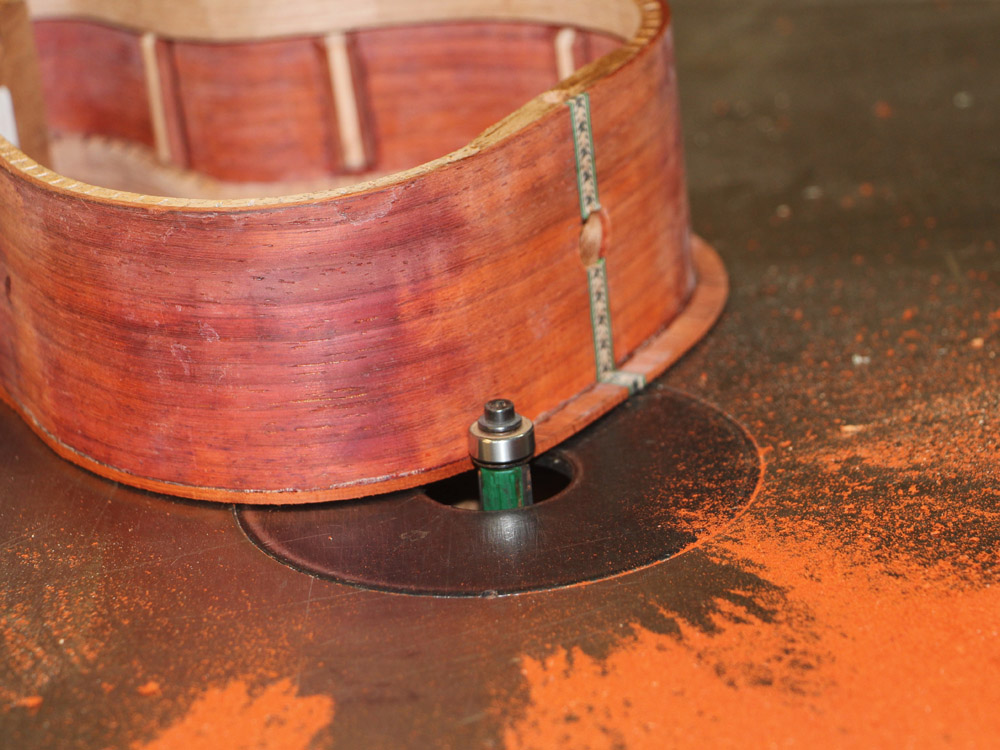
I use my router table to trim the back to the sides.
 ( 139 ) 16-Feb-2015
 ( 140 ) 16-Feb-2015
The assembly goes back into the form and glue is applied to the top of the rim.
 ( 141 ) 16-Feb-2015
The flange pushes the top into place.
 ( 142 ) 16-Feb-2015
And after the glue has set the body comes out of the form and the top gets trimmed to the sides.
 ( 143 ) 16-Feb-2015
after the top has been trimmed.
 ( 144 ) 16-Feb-2015
 ( 145 ) 16-Feb-2015